In this tutorial, we are going to explore how to create a Face-me Component in SketchUp. In other applications, these are often called "billboard" components. Their main feature is that they consist of a single face (although they can be more complex, too) but they always face the camera so we can use them as backdrops in our scenes without having to load high-poly 3D models. Usually they are used in the background however as from closer look, they may not look too convincing and it is often hard to take birds-eye-view shots where they reveal their thin appearance.
Importing the image
For this purpose, we can only use image types that support transparency. SketchUp supports png and tif format for example but png is much smaller in file size so it is more recommended. You either need to find images that already have this transparency set or create your own using an advanced image editor (it is beyond the scope of this current tutorial however).
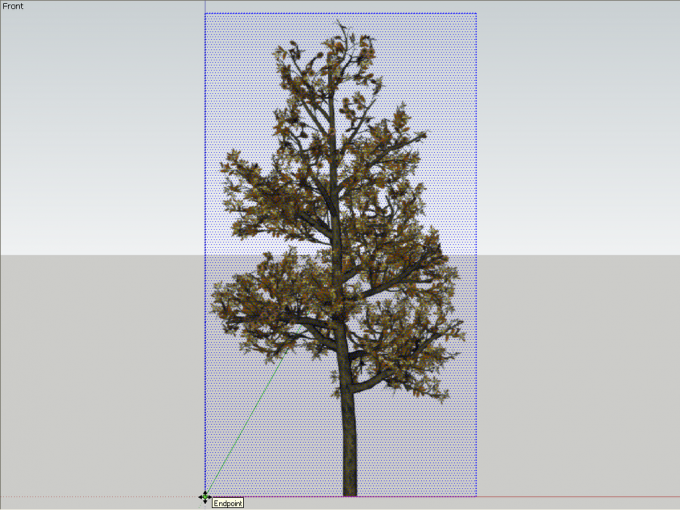
In the screenshot above, I set the view to front (so that an imported image comes in already vertically), imported the image and scaled it roughly to the size of a real world tree. Explode the image after doing all this. We can see a face with a png image (with transparency around the tree) applied to it.
Creating the Component
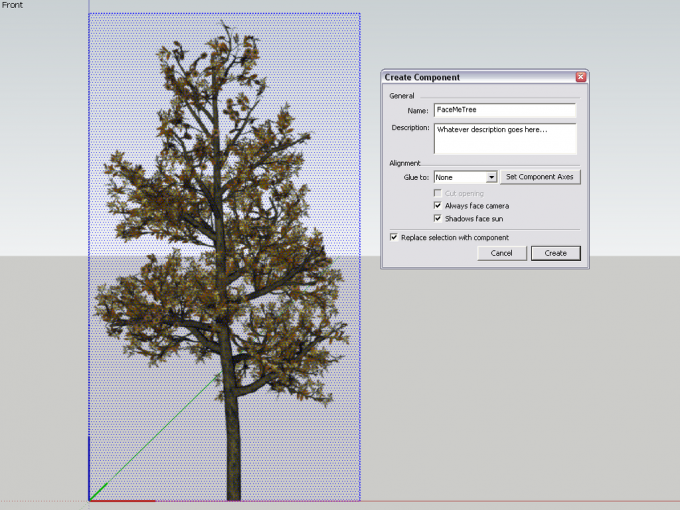
In the next step, select all your face and edges (double click somewhere in it) and right click > Make component. The component dialog pops up with the different options to check.
Here check the "Always face camera" option and make sure that the "Shadows face sun" option is also on. This will cause the shadows to always be "full" shadows even if the sun is shining from the "edge" of the billboard component (i.e. you will not have unrealistic, narrow shadows).
Setting the Component Axes
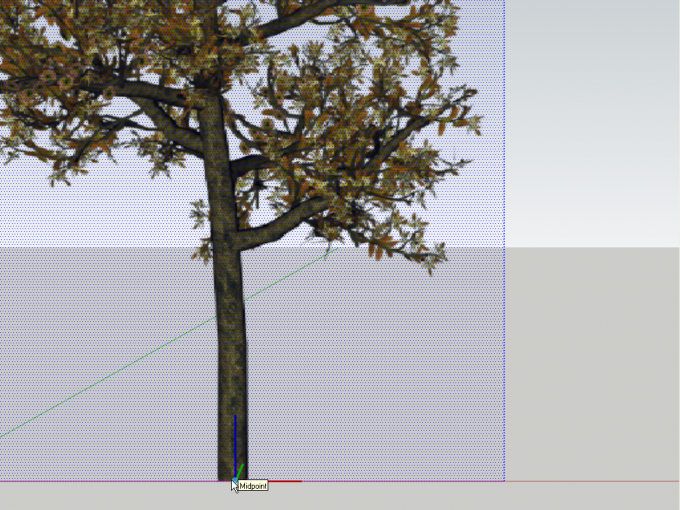
A very important step here is to set the component axes (use the button in the Create Component dialog). Without this, SketchUp will place the component origin to the corner of the component and our tree will rotate around that corner instead of the middle of the trunk.
Note that in my case above, the middle of the trunk happens to be on a midpoint but it will not necessarily be so in every case so you may zoom in pretty close to place the axes properly. Click once to set the origin then again to finish setting the axes. Make sure you leave the red axis on the edge otherwise your component will not be completely perpendicular to the camera.
If you miss this step and end up with a component rotating around its corner, do not panic: you can fix it. Go to front view again, right click and "Change axes". Now place the origin where you need to and do just like described above.
Fixing the shadows
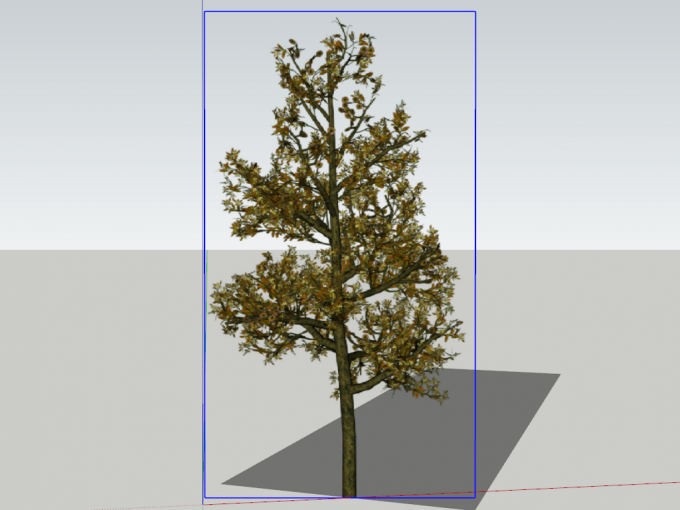
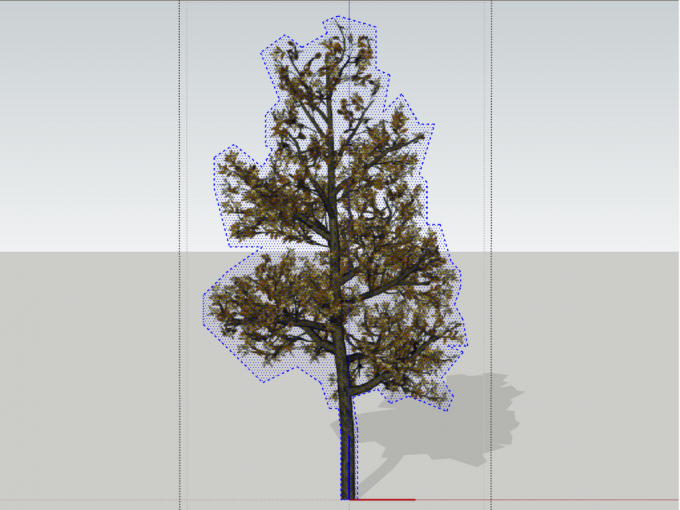
There is one thing we need to do now. SketchUp, though it supports transparency in image files, its shadow engine does not. Therefore any transparent pixel in an image will cast shadows just as non-transparent pixels like in the image below.
Unfortunately, there is no real solution to this problem (although sometimes it comes in handy but more about that in another tutorial). The only thing we can do is to make a rough (or finer) outline for our tree. I say "rough" because it does not necessarily need to be very detailed (and that would also increase poly-count) but it really depends on your needs. Below I made a rough cutout and deleted the extra geometry outside of this rough tree shape.
This way we can balance between performance and appearance to our needs. In order to speed up this manual cutout process, there are a couple of plugins available like Image Profile at Smustard or Image Trimmer in TIG's SKM Tools. Both have the option to define the "accuracy" of the trimming process (i.e. you can also control how "fine" your cutout is and how high-poly stuff you can allow yourself).
Another way to provide a "semi-realistic" shadow without having to cut around each plant is what Alan Fraser developed and shared in this forum topic. Another of his trees with a similar solution can be found here. They are not the tree models we are discussing here but if you download them, you can find a "dummy" shadow caster component nested in the parent tree component.
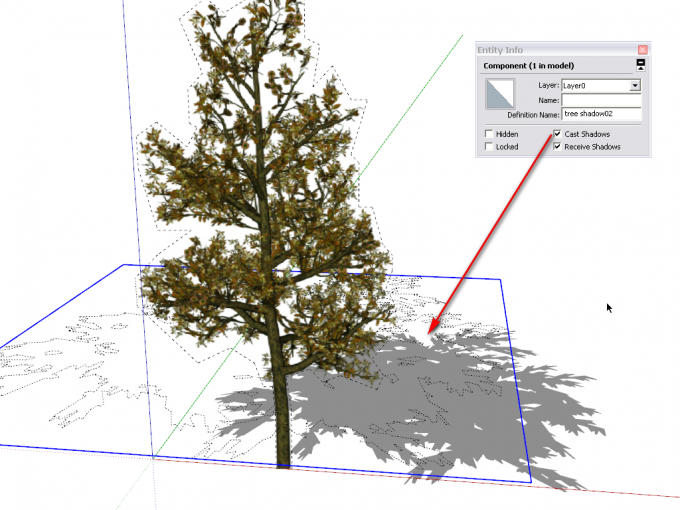
The idea here is to create one or two (or a few more for more variations) flat components with various "cutouts" and paint them with a simple, fully transparent png material (it can even be 1px x 1px). As png transparency is not recognized by the SketchUp shadow engine, it will always cast shadows but if you hide its edges completely, it will be invisible. Now you can turn your main component NOT to cast shadows (see the Entity info box) and from now on, you need not even cut it out any more just insert one or two of these dummy shadow casting components into it.
Most of the ray tracing rendering engines support either image transparency or at least clip maps so you usually do not need to tweak the shadows if you render with them. The above step and its variants are only for native SketchUp output.


