The component materials
Our most important diagnostic tool during this tutorial, will be the Entity Info dialog. One can never emphasize the importance of this little window enough. This should always be the first thing to check when we do not understand some geometry in our model. (In fact, I have got used to keeping it open all the time and it is hovering over my desktop while I am working.)
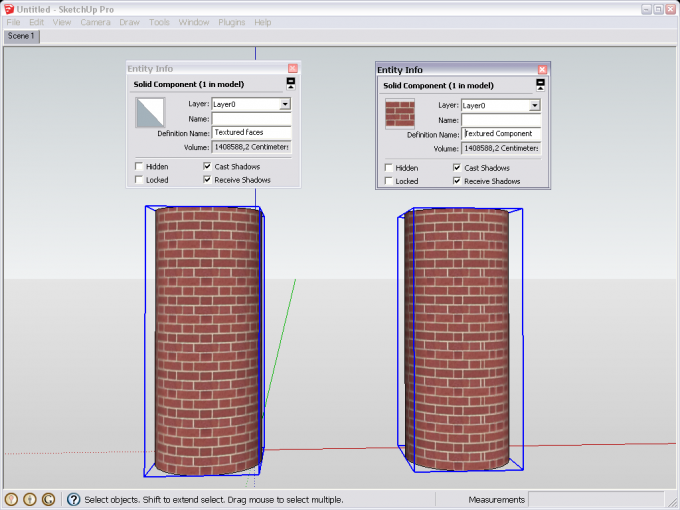
In the screenshot above, we can see a component (on the left) whose faces were painted with a brick material while I was editing it. You can also see that (by default), SketchUp tries to wrap the material around the cylinder continuously. The Entity Info box reveals that the component itself has not got any material added (more exactly it has the default material). On the right, I have added the same brick material to the component instance itself as you can see from the Entity Info dialog. Something else is apparent though: the brick texture is screwed up and does not continuously follow the surface of the cylinder.
The face/surface materials
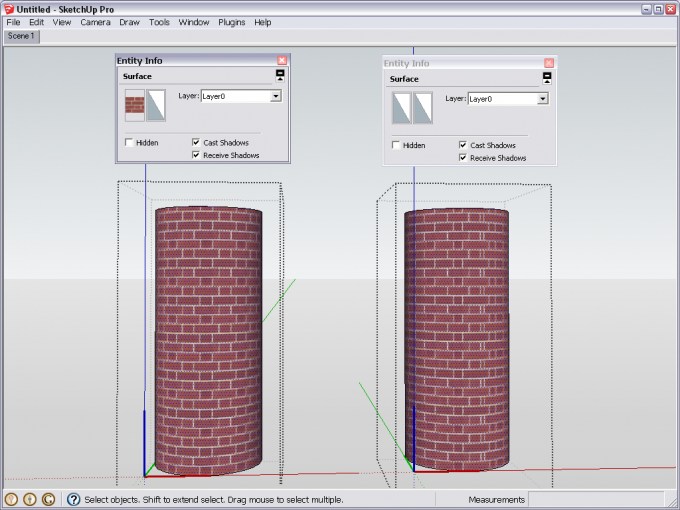
Of course, when we edit these components and examine what is "inside", we shall see the contrary. The faces (curved surface) of the left component are painted with the brick material while there is no (but the default) material added to the faces/surfaces of the right one.
We can see something else, here, two. Instead of the one, single material thumbnail we had in the first screenshot, we can see two in the Entity Info window here. The left one is for the front face while the right one is for the back face. Apart from certain, rare cases, one should never use materials on back faces (and, of course, always model "solids" with only the front face out) so in my example, only one thumbnail of the left component displays the brick material.
Trying to position materials
Now one can say this is all fine and dandy, everyone knows this. And yes, above a certain level, that's indeed the case. However without the Entity Info window open, noting will tell us what the case is and when we want to correct that screwed material in the right component, it will drive us nuts.
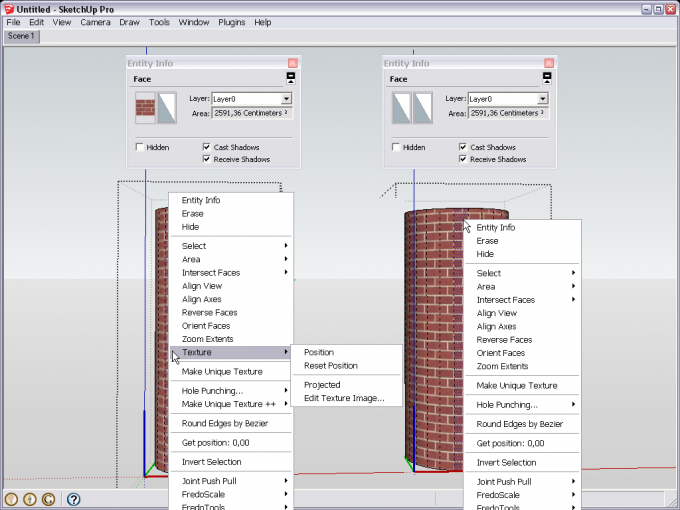
One can only position material on a single face in SketchUp. Not on a component or group, not on a curved surface. This means that we either have to enter the component's / group's editing context to access the raw geometry or have to turn on hidden geometry (View menu) in order to access the facets curved surfaces are made of.
This is what happens when we enter the editing context of the component and turn on hidden geometry. On the left, I can access the Texture > Position tool without any issues. On the right however, the whole Texture item is missing from the context menu (you cannot position colours of course and the default material is a colour). So despite everything seems to show that there is material that I should be able to position, in fact, there is none and if you do not think about this possibility (and check the Entity Info box), it will be some frustrating time for you.


 We can certainly read a lot about what the basic difference between texturing a component or group "from outside" (its editing context) or by editing it and applying the materials directly to the faces. Here is


