What is a component?
A component is, in fact, a (full fledged) SketchUp model inserted into another SketchUp model. Being a "component" only means that another SketchUp model is placed into a component "wrapper" (as we call it) so that we can handle it inserted or embedded into another model somewhat separately.
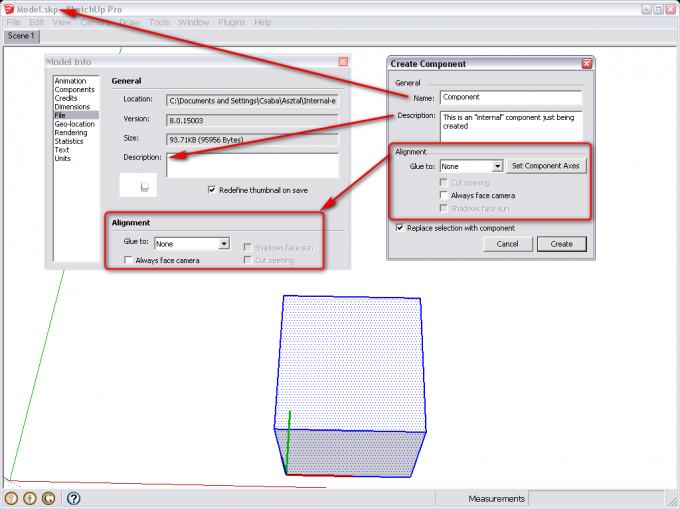
Above is a simple model with an internal component created in it. As you can see, if we open the Window menu > Model info dialog, under the File tab, we can see all the properties that we usually give to components. In this context, the ("saved" model file name is equivalent to the component name we would give to the component upon creation, there is also the description field, all the alignment behaviour settings etc.
Internal components
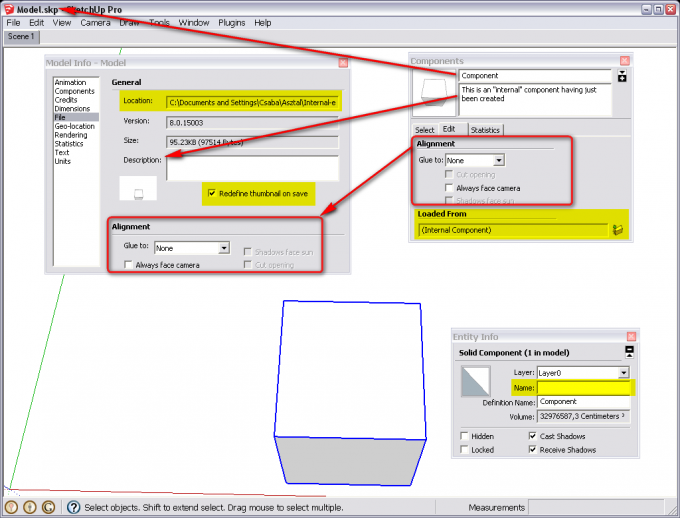
Now once we have created the component, we can always go back and edit its properties in the Window menu > Component browser > In model library (here select the component to edit) > Edit tab (see below). We can see a similar dialog to the Create component dialog here. There is one significant difference however: at the bottom, it says "Internal component" - meaning that it was not imported or reloaded from any external source but we created it inside the model we are working in at the moment.
If this were an external component, we would here see the file path to that component on our HD - similar to the "Location" filed of the Model info window on the left.
Some other fields are also highlighted here - now let' just talk about the "Name" field in the Entity info dialog (open it from the Window menu and select something to see what type of information it displays). Although this does not belong to this tutorial, let's just briefly clarify some inconsistencies in the SketchUp UI:
- What is called "Definition name" here is simply called "Name" in the Create component dialog and
- What is called "Name" here is the name of the individual "instance" of the component.
And yes, this could even be considered as a bug since it can easily cause serious misunderstanding.
The Model info > "Redifine thumbnail on save" box on the left will be interesting later in this tutorial.
External components
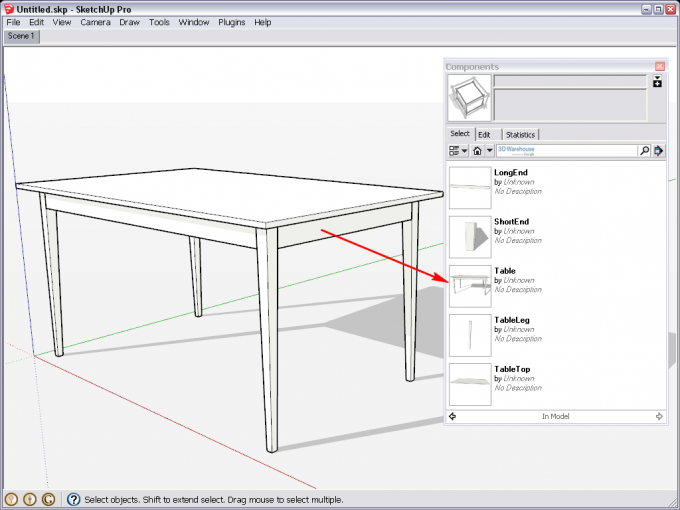
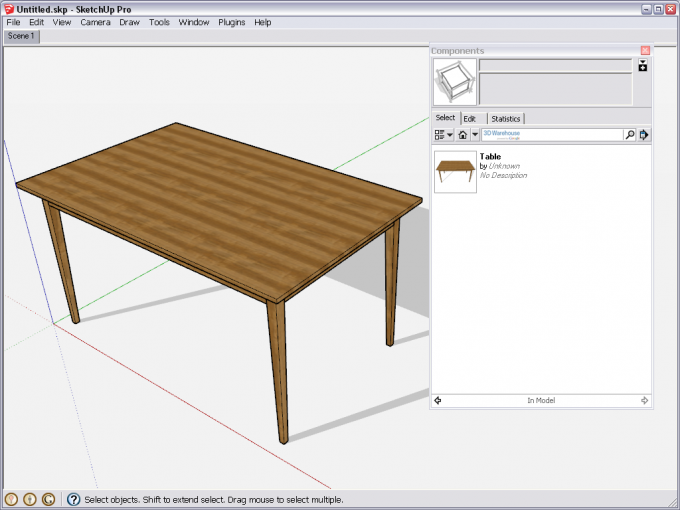
Let's have a little bit more complex component here - a table with some nested child components. As you can see SketchUp will list all child components of internal components which may be good while you are modelling a table but when you want to furnish a room as an interior designer, it will definitely clutter your Component browser.
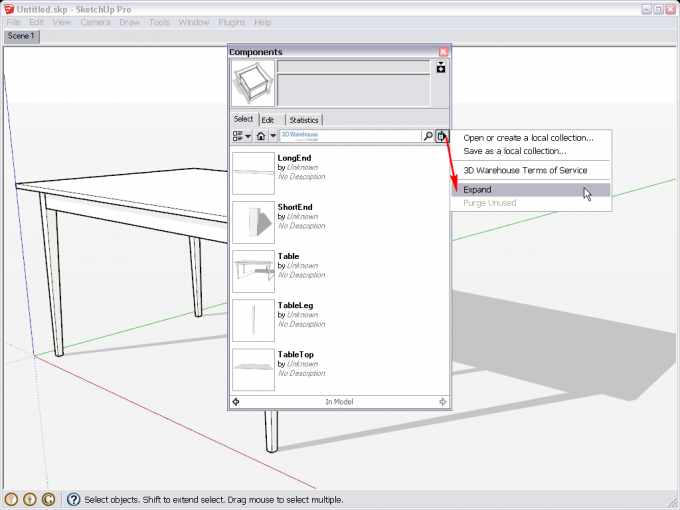
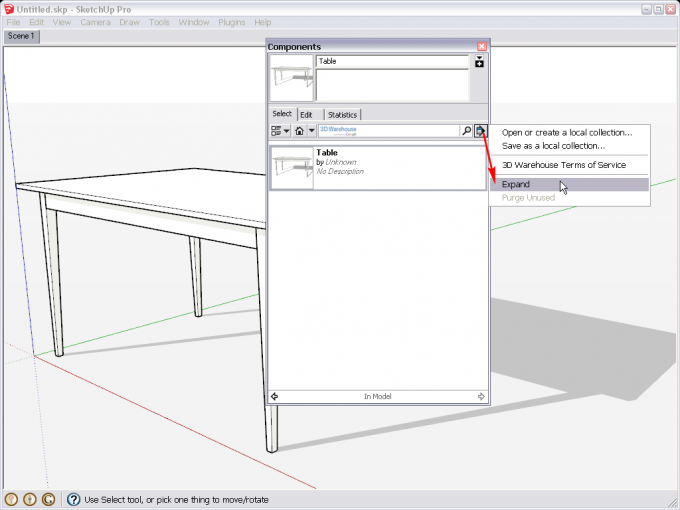
In the right flyout menu, there is an "Expand" command. One would think that unchecking it will collapse the child components and only the top level components will be seen. Unfortunately this is not the case however as we can see as internal components cannot be collapsed (why not, one would wonder though).
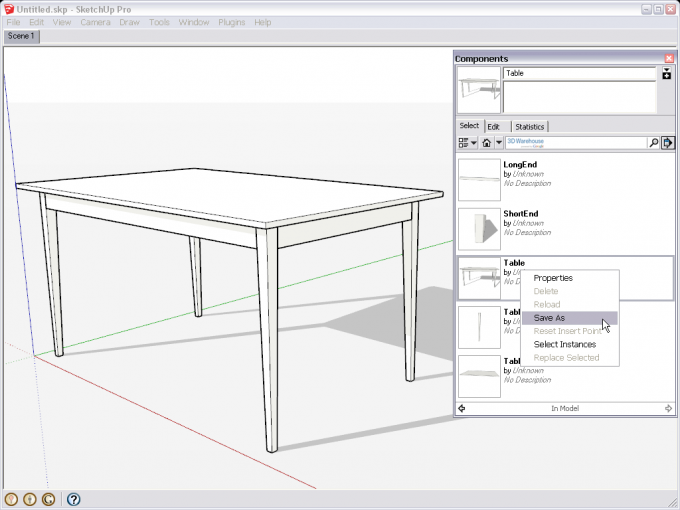
The only solution is to turn our internal component into an external component by right clicking it either in the Component browser or the model and selecting "Save as...". SketchUp will first offer to save it to the folder you defined under Preferences > Files but of course, you can navigate anywhere (like a project folder).
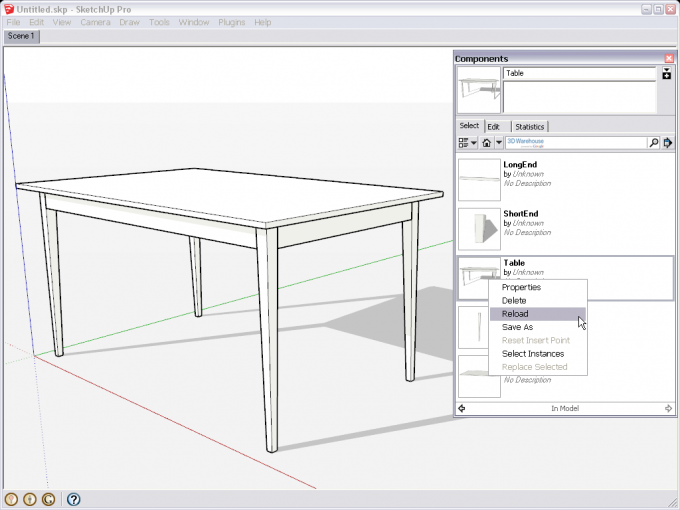
Right after doing this, now right click and "Reload" the component (or if you wish, work on it as in a separate SketchUp file and reload after saving that - see some notes about this below).
Now if we untick the "Expand" item in the flyout menu,only the top level (Table) component will be shown and all the nested, child components will be hidden.
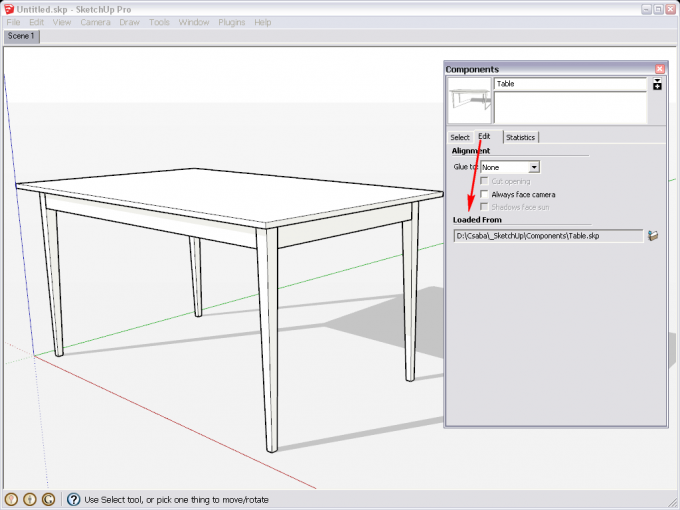
Furthermore, if we now go to the Edit tab (it is the same content as we can see while we are creating a new component), we can now see that it's not an "Internal component" any more but is loaded from elsewhere.
But what else is this technique good for? At first, it looks to be much a'do about nothing, really.
Redefining Thumbnails
A little annoying feature of SketchUp is that once you made the component, no matter how you modify it, its thumbnail in the Component browser will not change. Most of the time one creates a component with an orientation when it is the most practical to do it (especially after a complex selection from a set of geometry) and not how it would look best and most particular to the given component. In the below image, I saved the table component, opened the saved file, navigated to some better view and saved the model. If "redefine thumbnail" is checked (remember above), it will change the thumbnail image in the Component browser, too.
Scaling tricks with the Tape measure tool
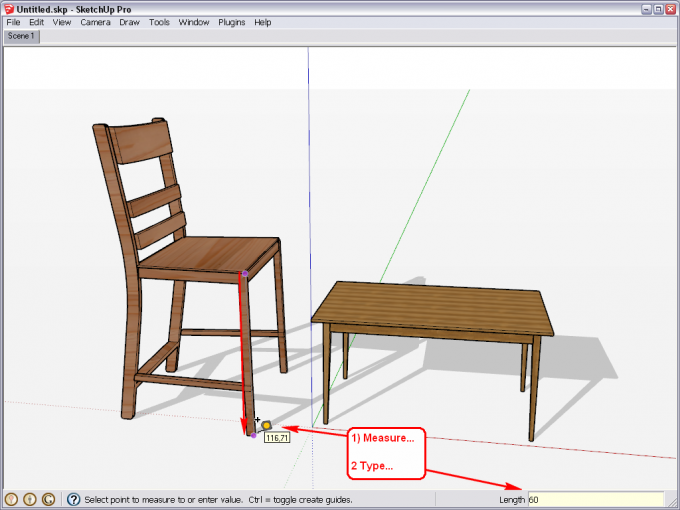
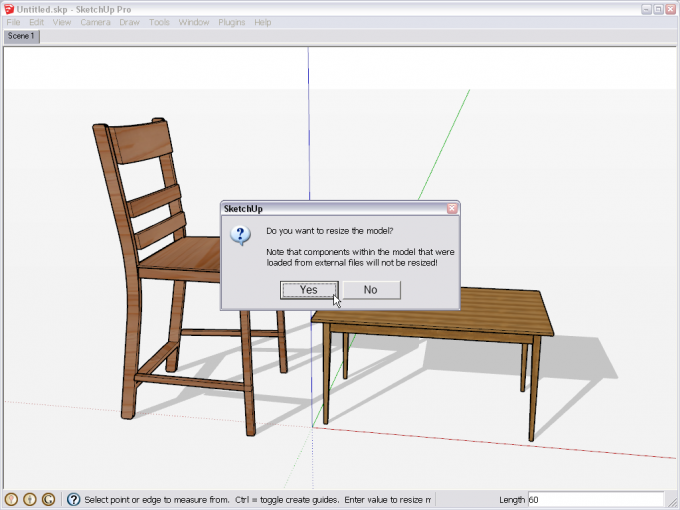
The below example is rather some trouble shooting tip than a "real technique" but since many new users (and sometimes experienced ones also) make mistakes, it is good to remember. As by now you probably know, the Tape measure tool can be used for scaling an entire model or scaling certain entities only. Many users tend to overlook the bottom line note however: "Only components that are created within the current model (not dragged from the Components Browser and loaded from an external component file) can be resized".
The most typical scenario is that someone starts to model (say) a house but dos not pa attention to the size of the building. At a certain point, he wishes to load some components from the 3D Warehouse and to his biggest surprise, they are completely out of scale - or at least relatively compared to his model. Here comes the technique; resize the whole model except what has been imported (here the developers suppose that other folks model to scale - which is unfortunately not the case so it's not always us who is stupid).
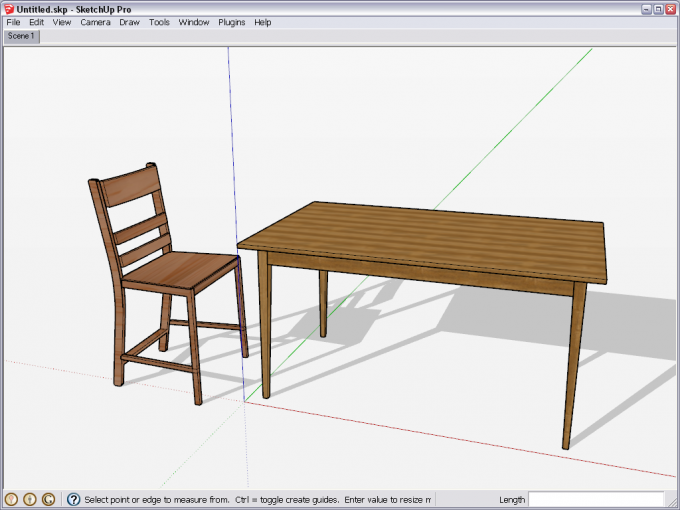
When the alert box pops up, answer yes and the result is that the entire model is now scaled except the table which is an external component.


