Setting up the scene
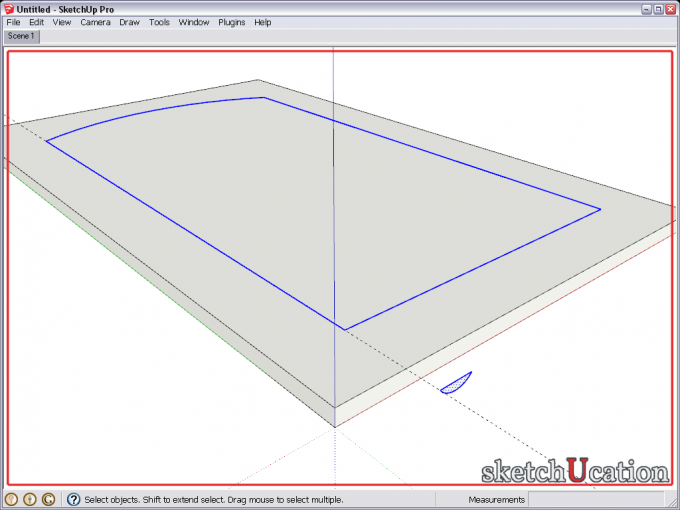
Here we have already modelled a cabinet door and made a path for the Follow Me tool with the Offset and Arc tools.
There is a guide along an edge of the offset path and the profile positioned on this guide line, perpendicular to it. Note that it does not even touch the geometry of the door but hanging in "thin air".
Applying the Follow me tool
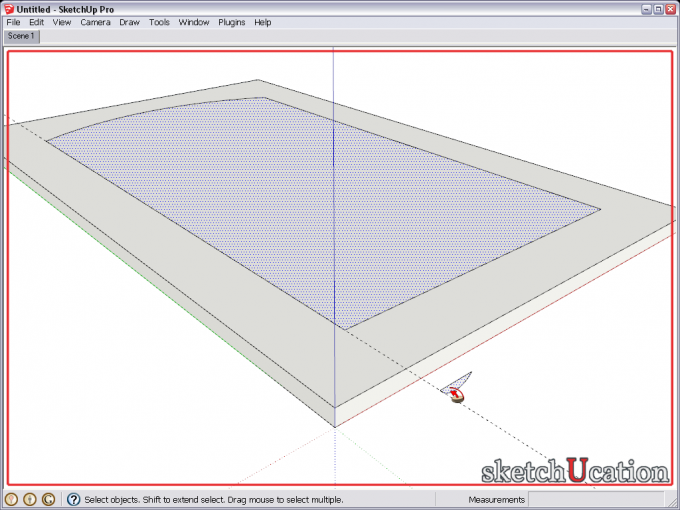
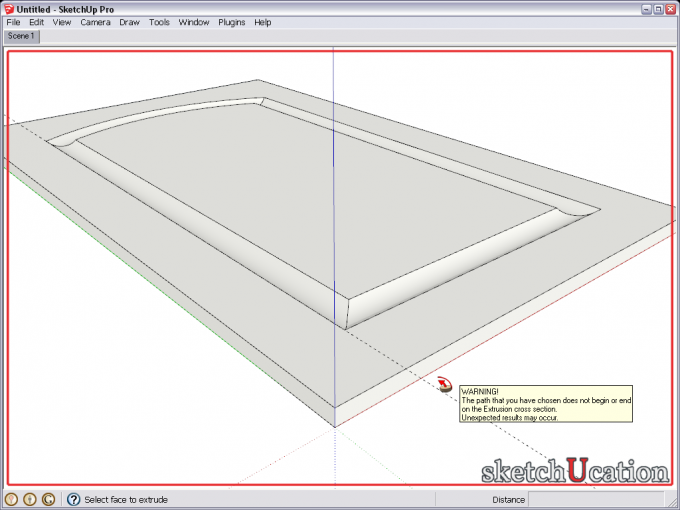
Now we do everything just as usual. Firstly click on the offset face on the door with either a single click or double click to establish the path. Then change to the Follow Me tool and click on the profile. Do not worry if your path selection "clears" when you select the Follow Me tool; this is normal (my image above is a composite of two screenshots just to show both selections in one). The tool will still "remember". After you click, you will immediately see your inner bevel - and that the profile disappeared from the model (so if you need it later, keep a copy of it in the model or use a component which you can explode prior to the Follow Me operation).
The "Error message"
Although everything looks fine in the model, we must admit that this sort of usage is most probably not what the developers originally had in their minds as we get the error message: "The path you have chosen does not begin or end on the Extrusion cross section. Unexpected results may occur". This may, of course, frighten a less experienced user but in our case, it is all right. We got what we wanted and no harm was done to the model either.


 The Follow me tool is one of the most powerful, native tools in SketchUp. There are some little tricks that can make life much easier. Making an inner bevel on a cabinet door's face may seem to be problematic first. Where to place the profile? How to avoid problems, like having to temporarily hide faces?


