Welcome to SketchUcation
Join a growing community and resource center for SketchUp Design Professionals
- Access over 800 SketchUp Extensions
- Learn with over 500,000 SketchUp users
- Browse hundreds of SketchUp Models, Materials and Styles
- Upgrade your account to access savings and discounts
Let's get better at design together!
-
Rayscaper Alpha - A new rendering extension for SketchUp
Read more...
We are excited to see the release of Rayscaper for SketchUp into public alpha-testing. If you want to partake just download and install and give it a test.
Still very earlier in development but already a robust and performative CPU based rendering solution made for SketchUp users. Easily add HDRIs and PBR materials from Polyhaven or load your own PBR materials.
-
Import and Optimize 3D models in SketchUp with FluidImporter Pro
Read more...
FluidImporter Pro is a SketchUp extension that quickly imports many different 3d model file formats into SketchUp.
Need to import models at blazing fast speeds from Blender into SketchUp? Got a high polygon OBJ file you need to poly-reduce? Or maybe a Rhino file to you need to remesh?
-
1-Click Renderings with AmbientOcclusion
Read more...Creating compelling images in SketchUp using the latest AmbientOcclusion extension for SketchUp. One-click rendering or delve deeper for realism.
If you are new to rendering in SketchUp or need a tool that integrates with SketchUp and is quick and easy then give it a try!
-
7 Tips to get started with SketchUp Free
Read more...Whether you’re a hobbyist wanting to use SketchUp for personal projects or a design professional wanting to try SketchUp Free before investing in SketchUp Pro, Go2School created a video to help you get started.
In the video, they show you how to access the web-based SketchUp Free, the right way to use the drawing, editing & navigation tools, and how to avoid the things that often trip up self-taught SketchUp users.
-
SketchPlus Released
Read more...SketchPlus for SketchUp is an extension that adds a large number of easy-to-use tools, many of which are inspired by existing popular free plugins or are commonly found in other 3D modeling applications.
Read on for all the details of SketchPlus or give it free 15 day trial.
-
New VR Plugin for SketchUp
Read more...
SimLab Soft just released the new VR plugin for SketchUp, it allows the creation of interactive VR experiences from inside SketchUp, and to share them with others in one click.
-
How to get started with FluidRay
Read more...
Looking to try out some rendering in SketchUp. If you are new to rendering then FluidRay offers a forgiving and intuitive UI with powerful PBR based materials.
Drag and drop, sliders, live reload and support for Rhino, 3DS Max and more. Make beautiful images of your designs in just a few clicks. FluidRay for SketchUp makes rendering easier than ever.
-
AI-Powered Interactive 3D Models from your SketchUp files

Bring together clients, co-workers, and collaborators around interactive 3D models for better, faster design decisions in augmented and virtual reality.
-
Vray for SketchUp 3.6 Released
Read more...
Chaos Group has released V-Ray 3.6 for SketchUp, the latest update to their professional rendering plugin. Built on Chaos Group’s industry-leading technology, V-Ray 3.6 for SketchUp simplifies the design process for architects and designers, offering photorealistic visuals and easy-to-use controls from concept to construction.
-
SketchFX Ex for SketchUp Review
Read more...Ever find yourself exporting static images from SketchUp and post-processing in PhotoShop? With SketchFX Ex for SketchUp, you can achieve the same result directly within the SketchUp viewport.
Using the same layering approach as PhotoShop, SketchFX utilises a smart approach to stacking effects. The outcome has near infinite possibilities. But is it any good?
During this modelling session, it is again important to separate the boolean operations of the outer and inner shells of the dome, just like in the "Creating a Cross Vault" tutorial. Now I will demonstrate the use of the Solid tools (SketchUp Pro only) while modelling the outer shell and the traditional Intersect tools (SketchUp Free) when modelling the inner shell.
Setting up the Outer Shell
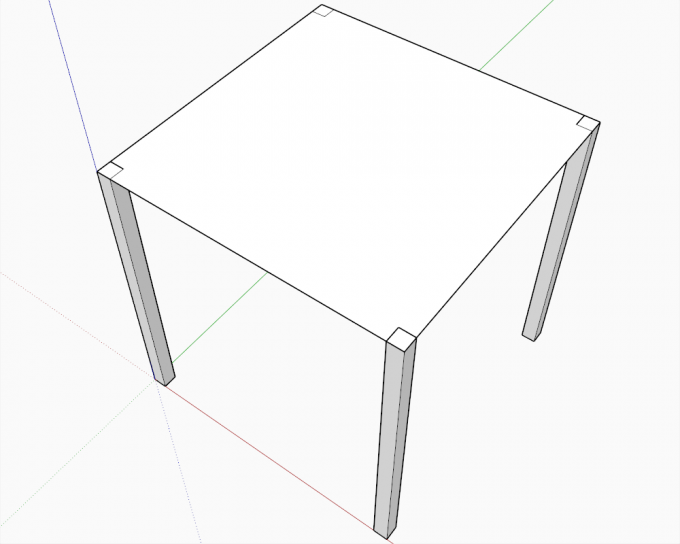
We start with four columns around a square again. Draw a square around the outermost corners of the columns and make it a group.
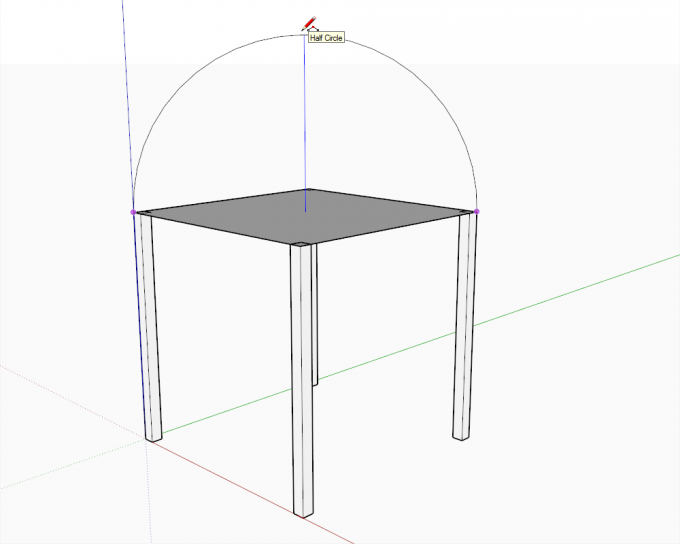
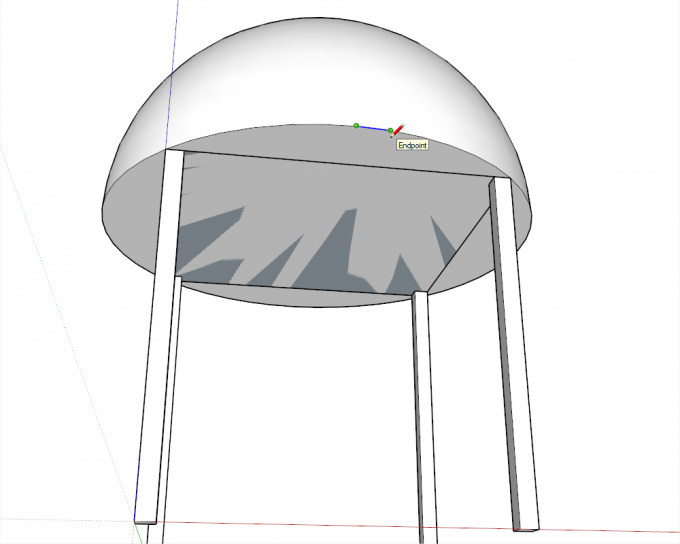
From the corners, draw an arc and make sure it is along the blue axis (see the blue inferencing line) and that it is a half circle.
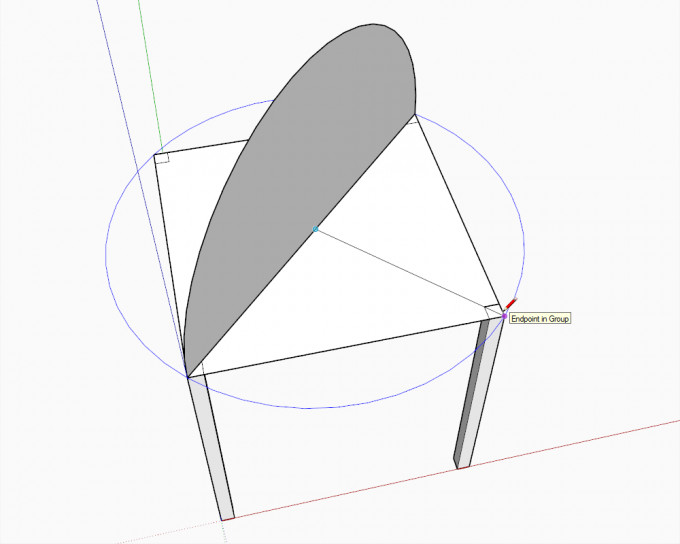
Connect the endpoints of the arc and draw a circle from the midpoint of the connecting edge to exactly the corner.
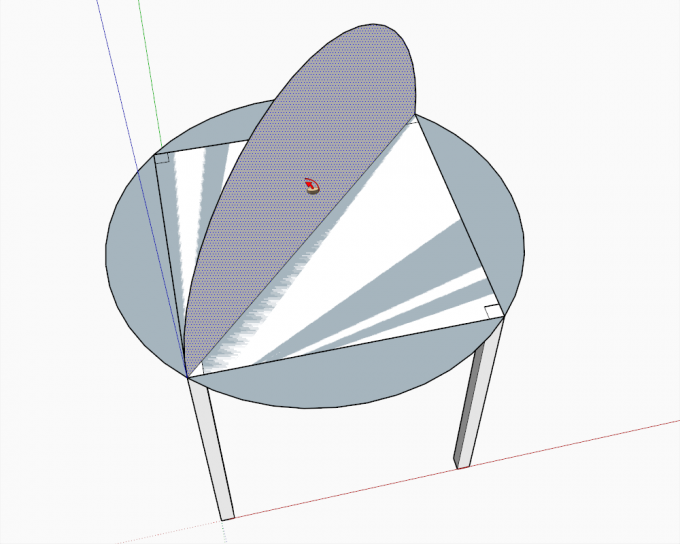
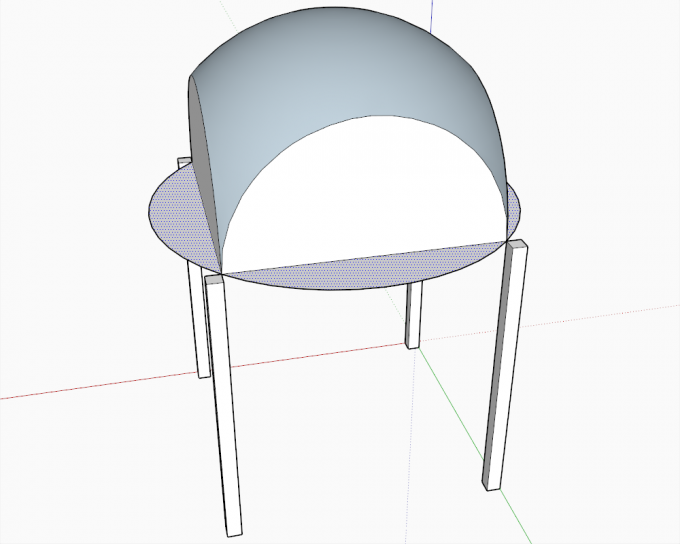
Select the edges of the circle and use the Follow me tool to lather the half circle around the circle to create the outer shell.
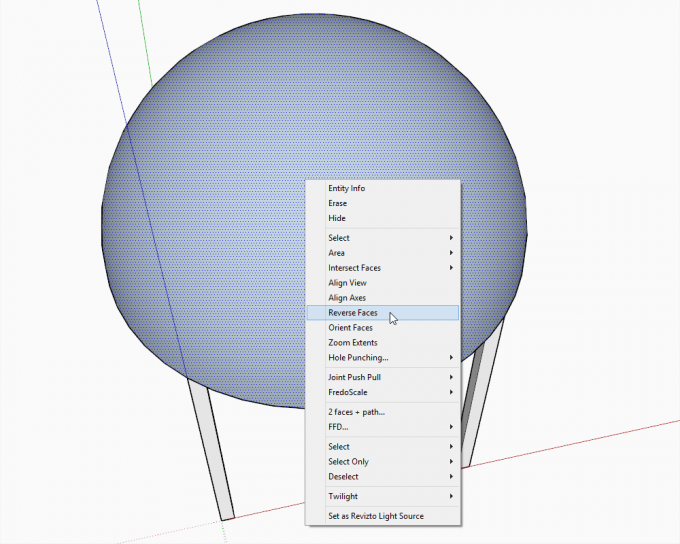
If it comes out "inside out" (i.e. the back face outside), right click and "Reverse faces".
This step is only needed if you do it with the Solid tools: redraw an edge on the perimeter to close the dome's bottom so that it will be a "solid" group in the next step.
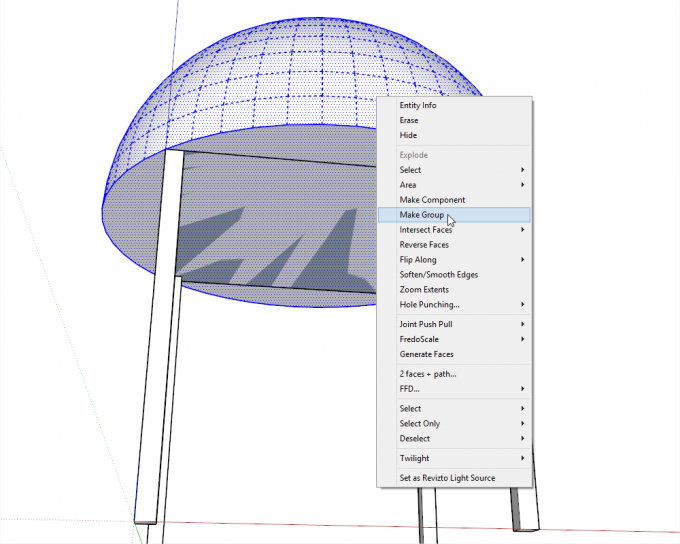
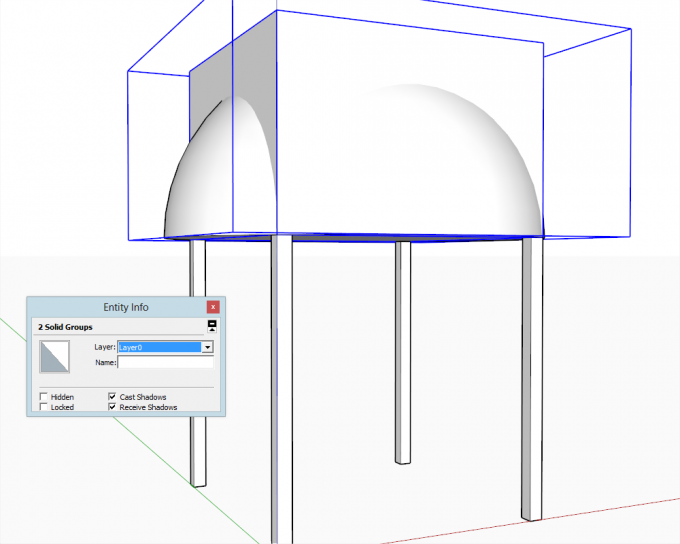
Select the whole dome (triple click on it) and make it a group.
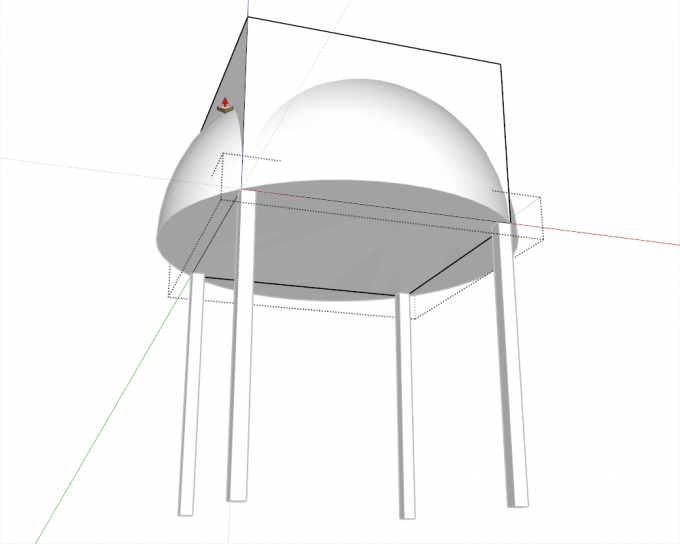
Open the group containing our rectangle and PushPull it up enough so that it covers the dome completely.
Now we have two solids to operate with.
Intersecting the Solids
If you have the Free version, you can skip this part and jump here.
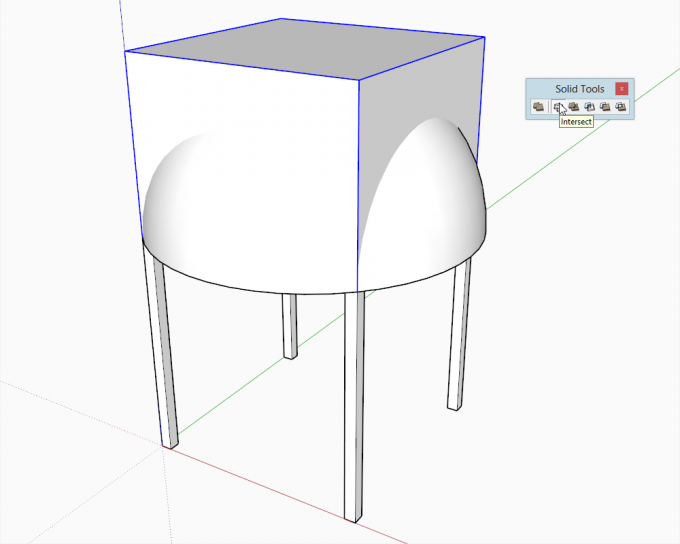
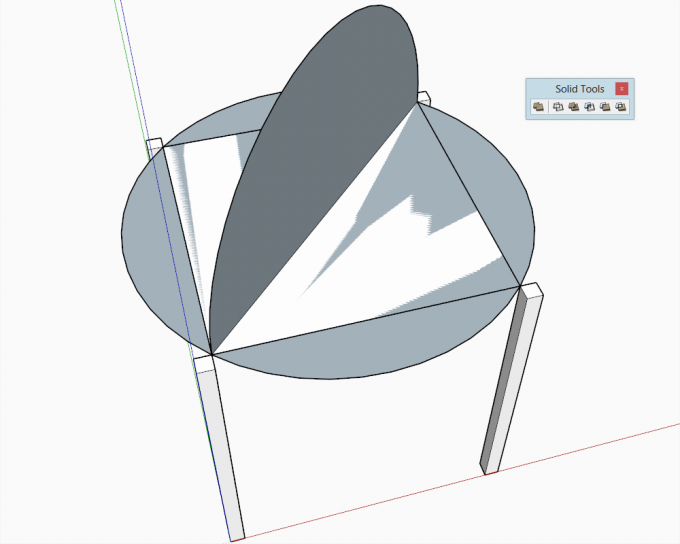
If you have the Pro version, select the box then the Intersect tool...
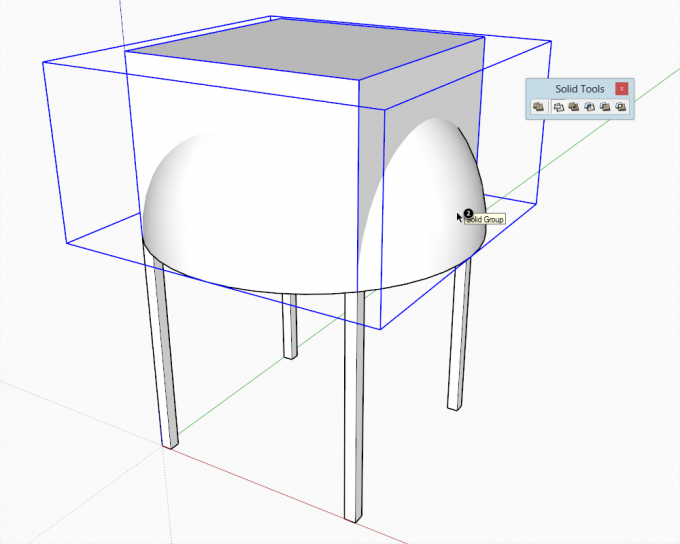
...and click on the dome.
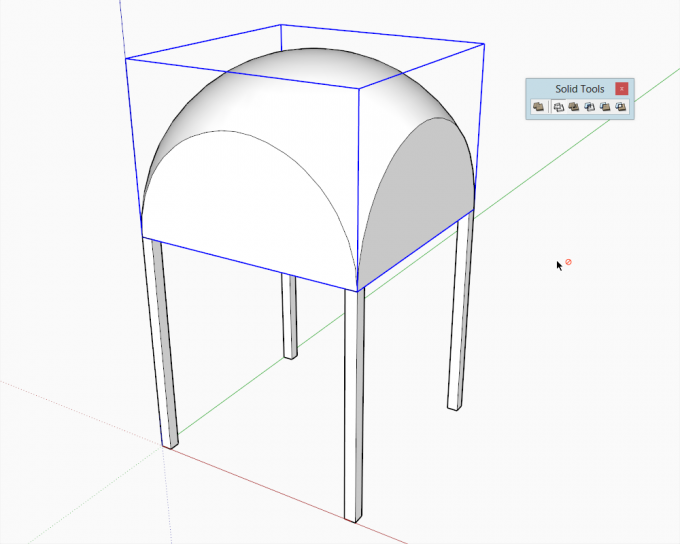
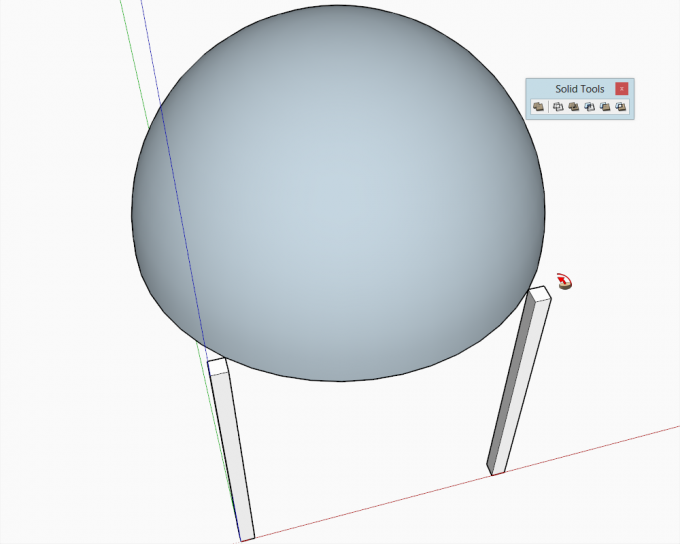
Here we are with our outer shell. Create a new layer, put this outer shell on this layer and hide the layer for the time being.
Setting up the Inner Shell
Repeat the steps under "Setting up the Outer Shell" only that now we draw everything snapping to the inner corners of the columns.
One thing is different: leave the back face upside now (as the front face surface of the dome will be inside, seen from below).
Intersecting with the Traditional Intersect Tools
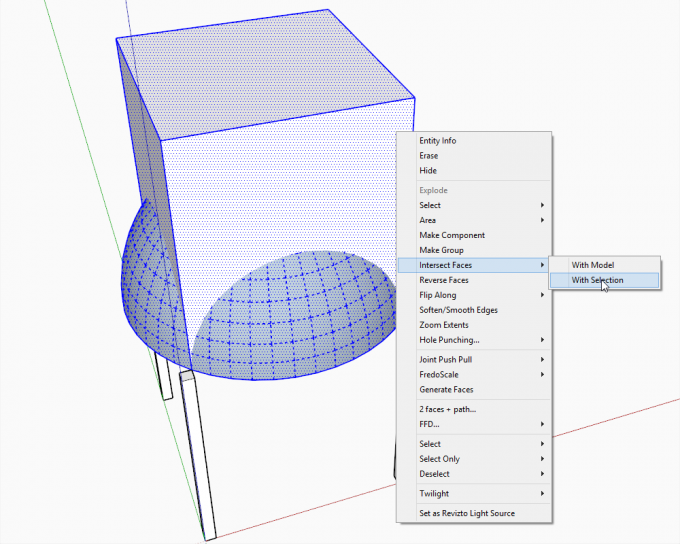
If you have the Pro version and use the Solid tools, you can now repeat these steps but if you wish to practice the traditional intersect tools (as we sometimes need to work with non-solids) or you have the Free version, explode both groups, right click and "Intersect with selected" (although in our case "with model" would just do the same).
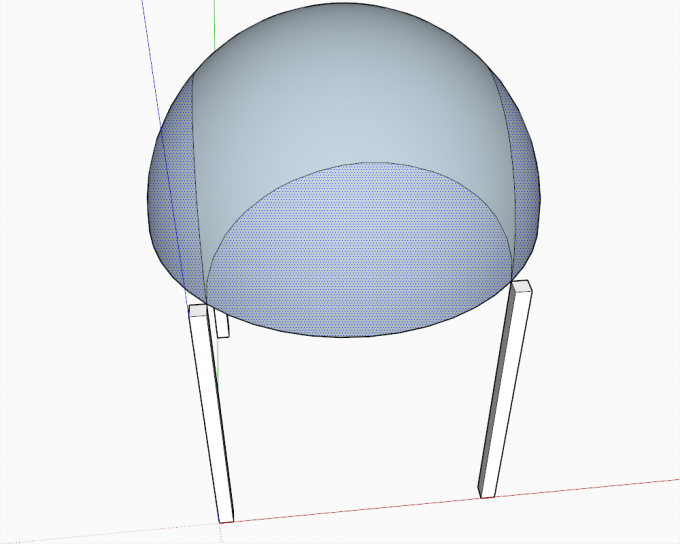
Now comes the tedious part: I have already removed the upper, remaining parts of the box. Select these side surfaces and delete them.
Select the remaining parts of the face of the bottom circle (if there is any at all since for this part we did not need to create it)
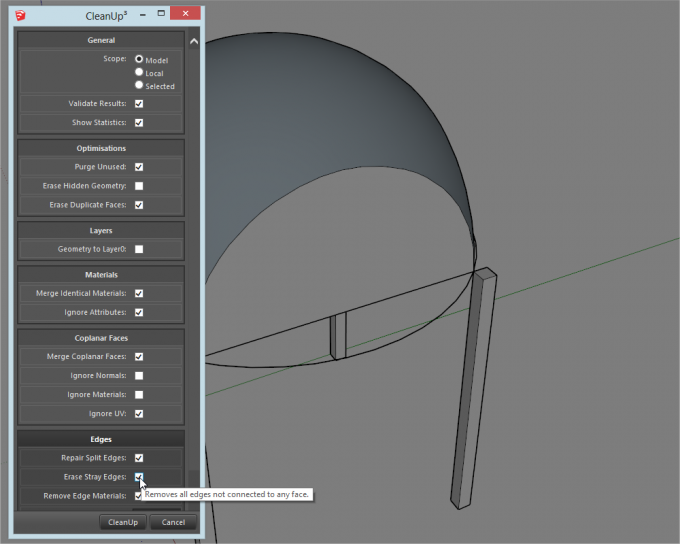
The remaining, stray edges are tedious to clean up so use ThomThom's Cleanup Plugin to get rid of them
Removing the Side Panels
When done in either way, turn on your hidden layer with the outer shell and explode everything.
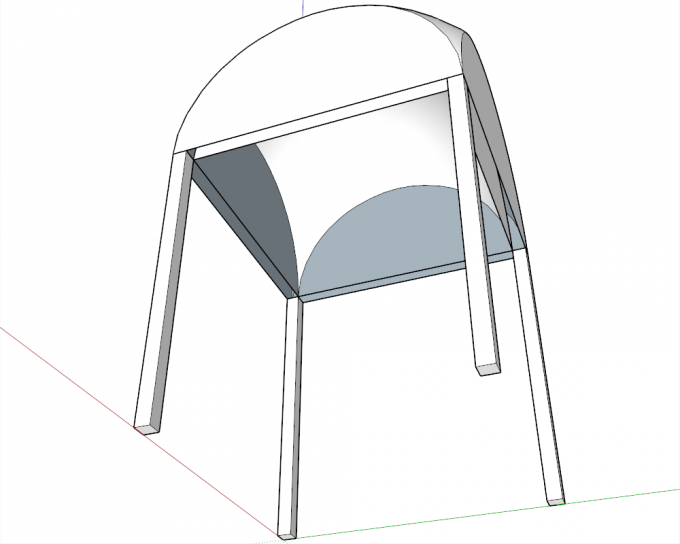
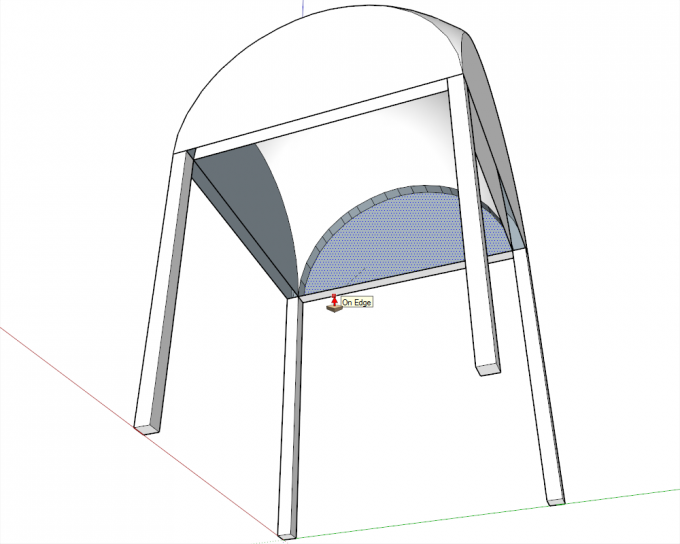
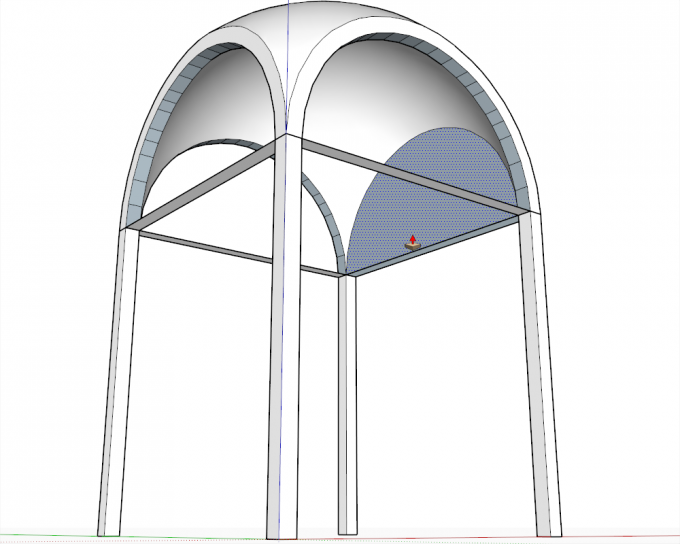
From inside out, start PushPulling the inner half circles. Make sure to snap to an outer edge or endpoint so that the PushPull tool stops exactly there and will cut the outer face properly.
After the first PushPull (which establishes the distance you PushPulled), you can simply double click on the other faces to speed up this operation.
Finally select the remaining faces and connecting edges and delete them.
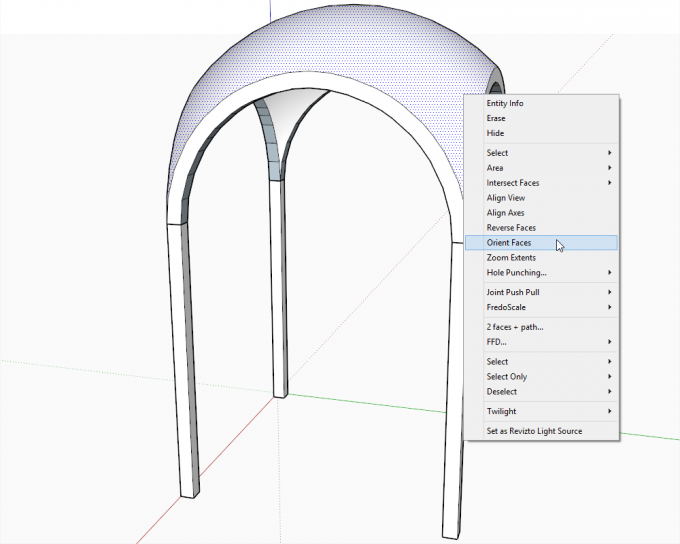
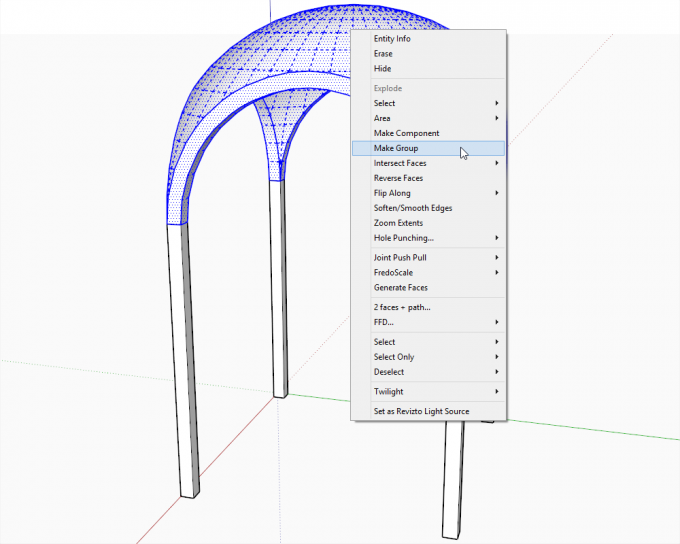
A little clean-up: right click on a front face and "Orient faces" to reverse those back faces under the arches.
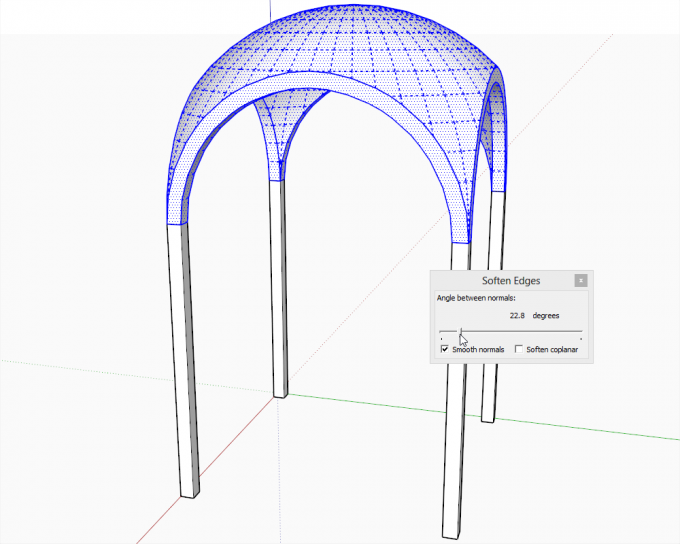
Select all (triple click), right click again and "soften/Smooth edges; you will probably only need to "touch" that slider a bit to soften the hard edges under the arches again...
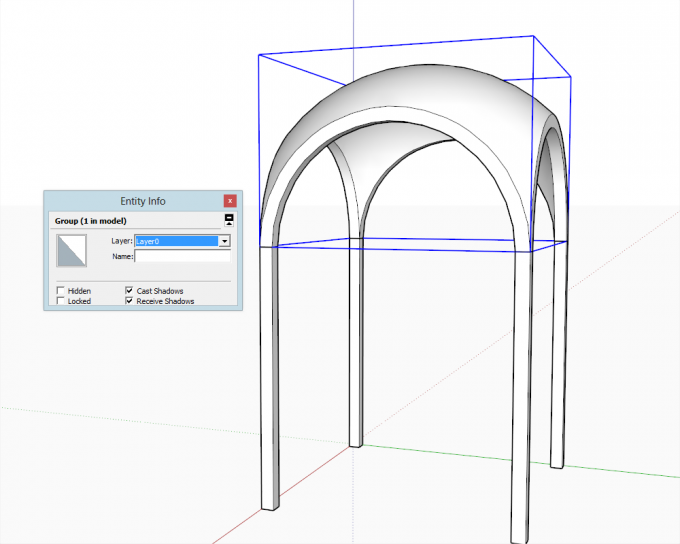
Group the whole thing...
...but notice that it's not a "solid"
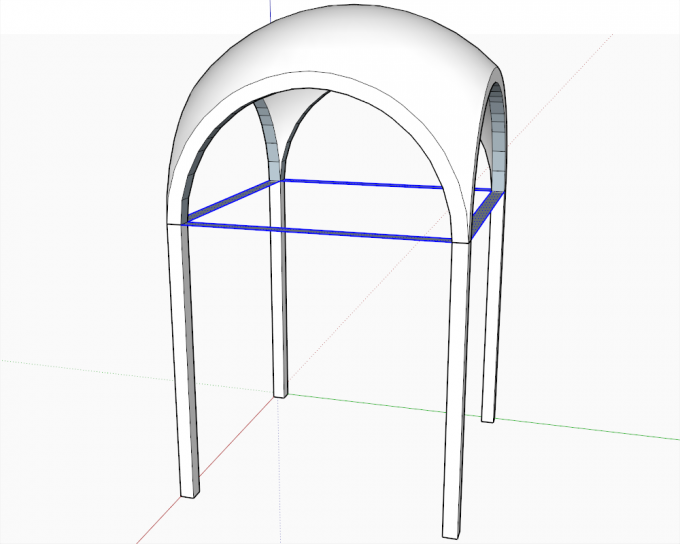
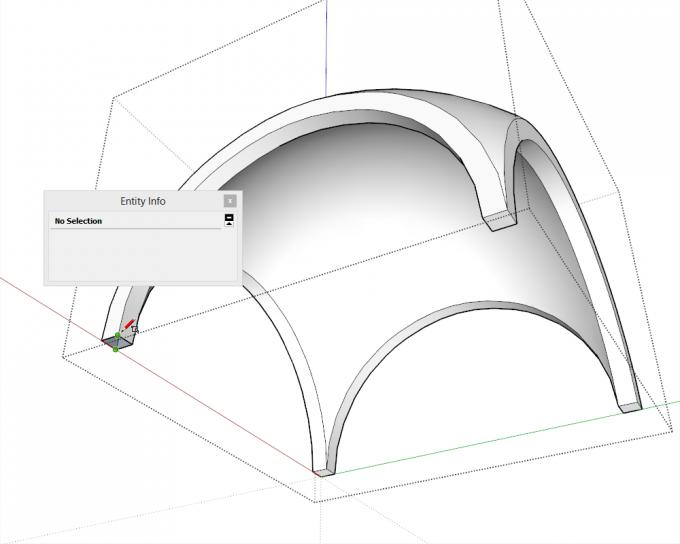
Hide the columns (or see my tip at the end of this tutorial), open the group and cover the bottom of the "legs" of the dome.
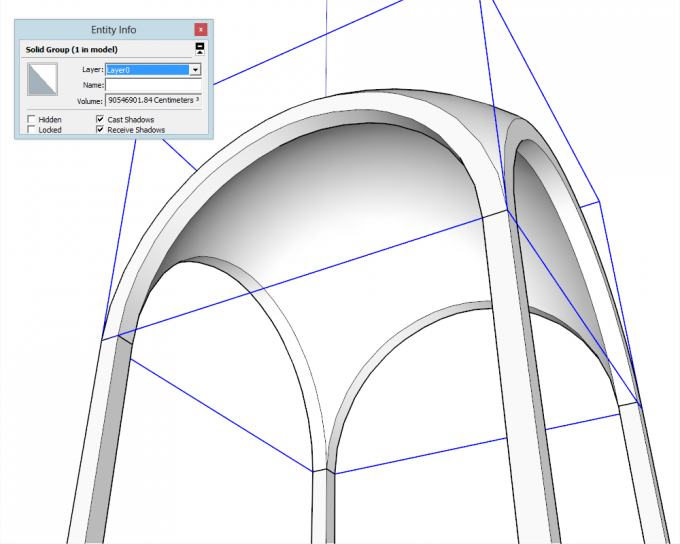
Now it is nice and solid...
This dome could be called a "hanging dome" (the English term "dome on pendentives" comes from the Latin "pndo" meaning "hang") but this bare kind of dome is rare in architecture however (or combined with cross ribs to form a so called "Romanesque cross vault" like in the Basilica of St Ambrose in Milan.
There is a setting under Window > Model info > Components to hide similar components (or groups) or the rest of the model while editing one. Now of course it is a tedious thing to open this panel every time you need it but you can easily assign a keyboard shortcut to these functions under Preferences > Shortcuts. I have Ctrl+H to hide the rest of the model and Shift+Ctrl+H to hide similar groups/components while editing one. This can speed up modelling parts that are covered by other objects - or inside a complex model generally.

Registered members can add their thoughts and ask questions in this forum topic.
