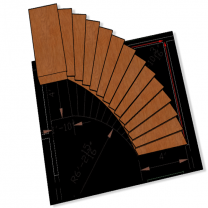
Today you will learn how to make a spiralling stairs when you have no CAD files only an image. In this image you can see that we have key dimensions to work from like the stairs width and the inner and outer radii.
This method uses no plugins and requires only a basic understanding of SketchUp. So regardless of your user level you are sure to find some useful tips in this tutorial.
Firstly, we must import the image into SketchUp using the File > Importmenu option making sure that 'Use as image' button is checked.

Once you place the image you will have to scale it so that it is accurate to the dimensions. You can do this quickly by drawing a line over the image and then using the Tape Measuretool to resize this line and the image selected to a known dimension.

Now you are ready to begin modeling. Draw a rectangle on the landing area using the dimensions on the drawing and PushPullit to 9' in heigth.

Draw two 13 segment arcs using the Arctool and align them to the arcs in the drawing.

Draw 12 lines using the Linetool from each segment endpoint to the opposite side.

Now select the vertical edge and divide it into 14 segment using Right click > Divideand enter 14 into the VCB. This will create snap points for the next step.

Now you can use the PushPulltool to create each step at the correct riser height by using the divided edge as snap points.

With our framework in place we can now begin to remove the unwanted geometry. Select the top face and it's bounding edges by double clicking it then Shift+Left click the face to leave only the edges selected. Move a copy using the CTRL key modifier and the Movetool while constraining the movement to the blue axis using the Up Arrow key. Align this with another step to set the location.

Using the Movetool we can now begin to place the lower enpoints in line.

Once complete we can smooth these hard edges using the Erasetool while holding the CTRL key.

Now you can add the details and texture it as you wish.


